Winter Backpacking: Hale, Zealand, and the Bonds Traverse - NH 48 4,000 Footers
/Winter Backpacking: Hale, Zealand, West Bond, Bond, and Bondcliff Traverse
HIKE STATISTICS
Total Distance: 24.4 miles (7.5 miles Day 1 and 16.9 miles Day 2)
Elevation Gain: 5,500 feet (2,600 feet Day 1 and 2,900 feet Day 2)
Hiking Time: 2 Days (5 hours Day 1 and 10.5 hours Day 2)
Difficulty: Difficult
Curious to learn more about these peaks during the summer time when there is no snow? Click here for Mount Hale, click here for Zealand, and click here for West Bond/Bond/Bondcliff!
Want to feel what it is like to experience these peaks? Watch our vlog which you can find here!

HIKE DATE: 02/16 - 02/17/2020
Description: This was our first time doing a winter backpacking trip! The first day, we went over Mount Hale and then spent the night at Zealand Falls Hut. The next day, we went over Zealand and the three Bonds (West Bond, Bond, and Bondcliff) and then headed out via Lincoln Woods. Due to their remoteness, Zealand and the three Bonds are almost always done together in a single day or as an overnight trip. These peaks are no joke in the winter given how isolated they are - there are not many bailout options and you are truly on your own!
Trails Used: Ascend via Zealand Road to Hale Brook Trail to the summit of Mount Hale. Take Lend A Hand Trail to Zealand Falls Hut. Head up Twinway to Zeacliff then onto Zealand Mountain (short spur path) and then Mount Guyot. At Mount Guyout, take Bondcliff Trail towards West Bond (spur path), then over Mount Bond and Bondcliff before descending on Bondcliff Trail. Take Lincoln Woods Trail back to the parking lot.
Trail Summary: Note that the route we will describe is a traverse, so you will need to have two cars (one for each trailhead) or use some sort of shuttle service / car spot. We left our car at the Lincoln Woods trailhead and had a ride arranged with someone from Facebook (thanks Rachel - you are the best!). She picked us up at Lincoln Woods and dropped us off right at the start of Zealand Road (closed in winter). If you are planning to leave a car at Zealand Road, you will need to park in the large lot about 0.2 miles up the road on the left. It felt so strange to us starting a hike at 9:30 AM since we’re usually starting much earlier than that! Since Zealand Road is closed in the winter, this meant we had a 2.5 mile road walk to get to the Hale Brook Trail. It honestly went by much quicker than we were expecting - it probably helped that the road was packed down by snowmobiles / skiers / hikers which allowed us to wear spikes. It took us about an hour to reach the Hale Brook Trail from the start of the road. When we got there, we could tell the trail was a mess due to people barebooting, so we put on our snowshoes. The Hale Brook Trail is one of the most straight forward and gentle in the White Mountains, offering moderate grades and good footing the entire way. Every time we hike this trail, we are always shocked by how much elevation we gained so quickly since we could not really feel it due to how easy/moderate the trail is. From the trail head, the trail ascends steadily. The only section we needed to use a bit more caution on was what is known as the sidehill section - a narrow portion of the trail with a steep drop on the side. This section was ravaged by postholes and there were a few times we slipped down slightly even with snowshoes on. After this point, the trail continues to climb steadily and uses some switchbacks. The trail begins to offer some restricted views through the trees as you get near the summit (the only views of the day) and we found that the snowpack helped make those views just a bit better than they normally are in the summer. When you come to the clearing with a HUGE cairn, you’ve reached the summit! It was funny to see the cairn in winter since it did not look nearly as large due to the snow coverage. From the start of the trail, it took us about 2 hours and 15 minutes to go the 2.3 miles to the summit. It took longer than expected, but we had heavy packs and were trying really hard not to sweat. Though Hale tends to have a reputation of being a miserable peak since there are no views, we actually really enjoy the hike as the forest you walk through is really pretty, especially with snow covered trees. Winter 48 peak #9 for us!

The road walk was made easier by nice views along the way and a packed path

The Hale Brook Trailhead; time to start our ascent for the day!

Making our way along the Hale Brook Trail and enjoying the nice weather

The sidehill portion of the Hale Brook Trail that was a bit sketchy

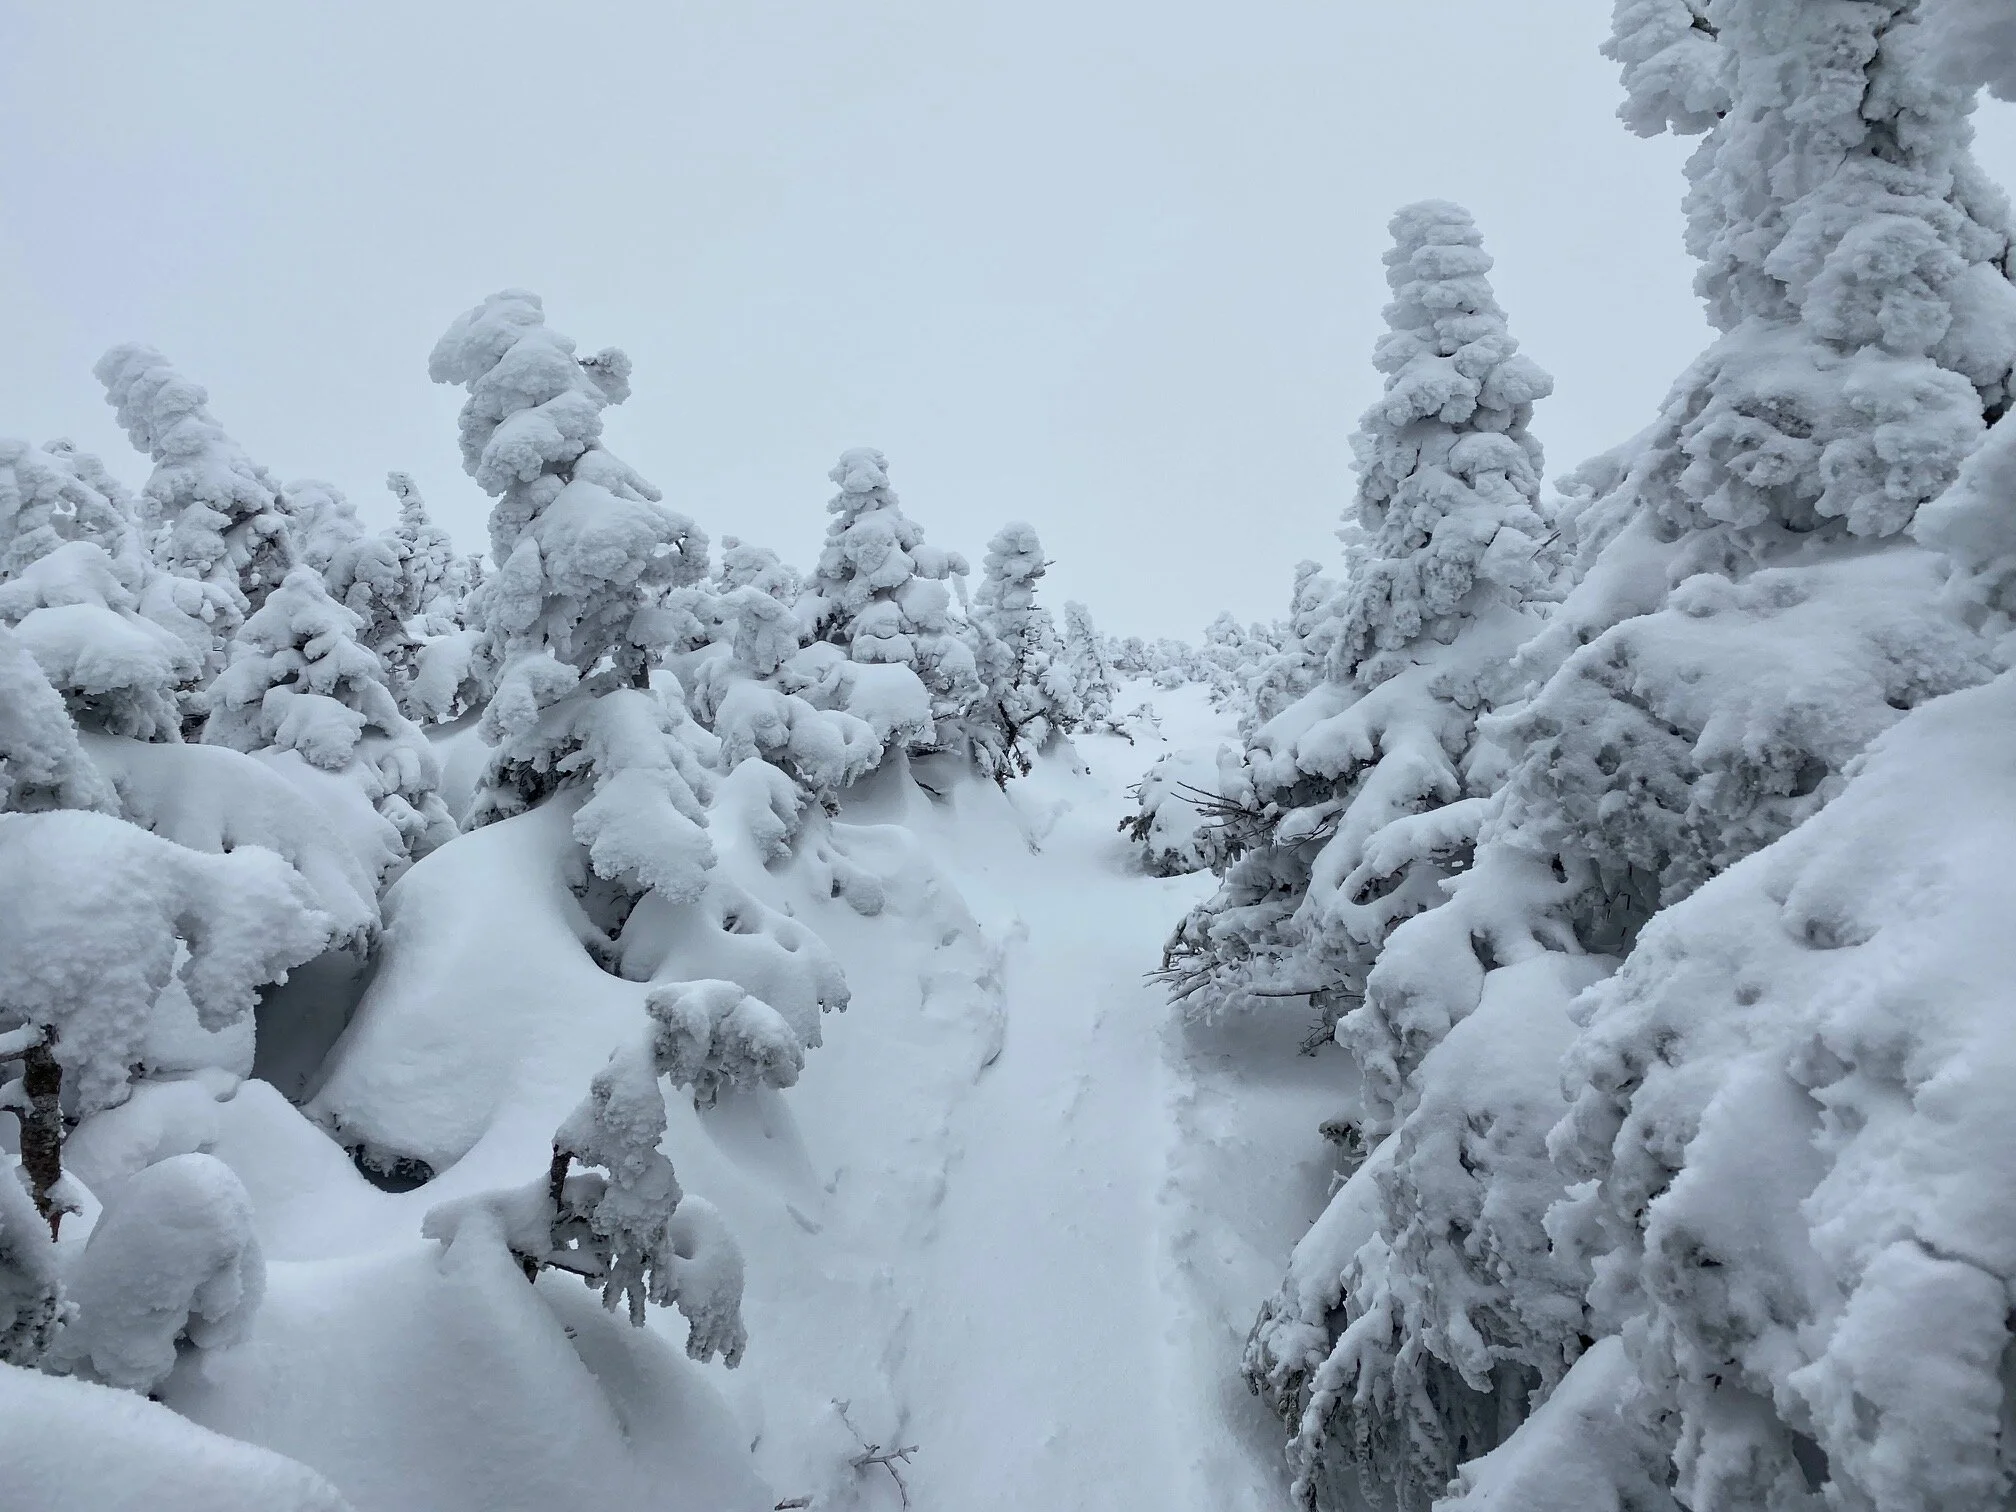
The more elevation we gained, the more the trail became a beautiful Winter Wonderland

At the summit of Mount Hale and hanging out by the giant summit cairn
After relaxing and refueling at the summit of Mount Hale, it was then time to begin our journey towards Zealand Falls Hut! We had never been on the Lend A Hand Trail before so we were not sure what to expect, but we really liked this trail a lot! The trail descended very gently for a majority of the time, with no steep sections or tricky spots. Most of the time we felt like we were going down at such a slight decline that we hardly even noticed it. There was a nice area along the trail that opened up a bit and had some limited views. We saw no one on this stretch of trail and really enjoyed the serenity of being in the woods together. From the summit of Hale to the junction with Twinway, we dropped 1,400 feet in 2.7 miles. At Twinway, we took a left and it was an easy 0.1 miles to arrive at Zealand Falls Hut.
While we have visited Zealand Falls Hut before when passing by it, we had never spent a night so we were really excited about that. We arrived at the Hut around 2:30 PM and were surprised to see how many people were already there. We scouted out the bunks and snagged two bunks nestled way in the back left corner of the south bunkroom which gave us a little bit more privacy (PRO TIP: Try to snag a bed in the south bunkroom because it is far away from the bathroom! The other bunk room has a door that goes directly to the outhouses, so you’ll probably be woken up by people going to the bathroom during the night). We heard from some people that if you get a bed on the wall that is near the wood stove, it is a bit warmer. Note that neither of the bunk rooms are heated; you can feel the difference in the temperature when you go to the bathroom then go back to the common area! We found that with the beds we chose there was a lot of condensation since we were on an exterior wall. We took the advice of fellow hikers and put boiling water in Nalgene bottles right before bed and put them in our sleeping bags at our feet. It was like having a personal heater! Luckily for us, the air temperature was right around 20 degrees, so we never felt too cold sitting around with our down jackets on. We were both actually sweating at one point in our 0 degree sleeping bags - at least we know they work really well! Around 4 PM, the care taker started the wood stove and it got up to about 40-50 inside the common area. There are several drying racks where you can hang up your clothes to let them dry out a bit. We spent a few hours playing Yahtzee and socializing with other hikers before we started our dinner. Note that for dinner, there are 30 minute time slots that you have to sign up for when you arrive to the hut. For our dinner, we packed in a Knorr rice side, chicken, and peppers & onions. It was delicious! We hung out for a bit longer and then went to sleep at 7:30 PM so we would be ready for our long day the next day.

Getting ready to head down the Lend A Hand Trail towards Zealand Falls Hut

Hiking along a nice open area on the Lend A Hand Trail

We made it to Zealand Falls Hut!

Our beds in the way back left hand corner of the Hut. You can see the condensation on the walls!

The kitchen area of the Hut; it’s nice not having to carry any pots/pans, silverware, plates, etc.

The view from the porch of Zealand Falls Hut with Vose Spur and Mount Carrigain way out in the distance

Our dinner with some hot chocolate! Yum!
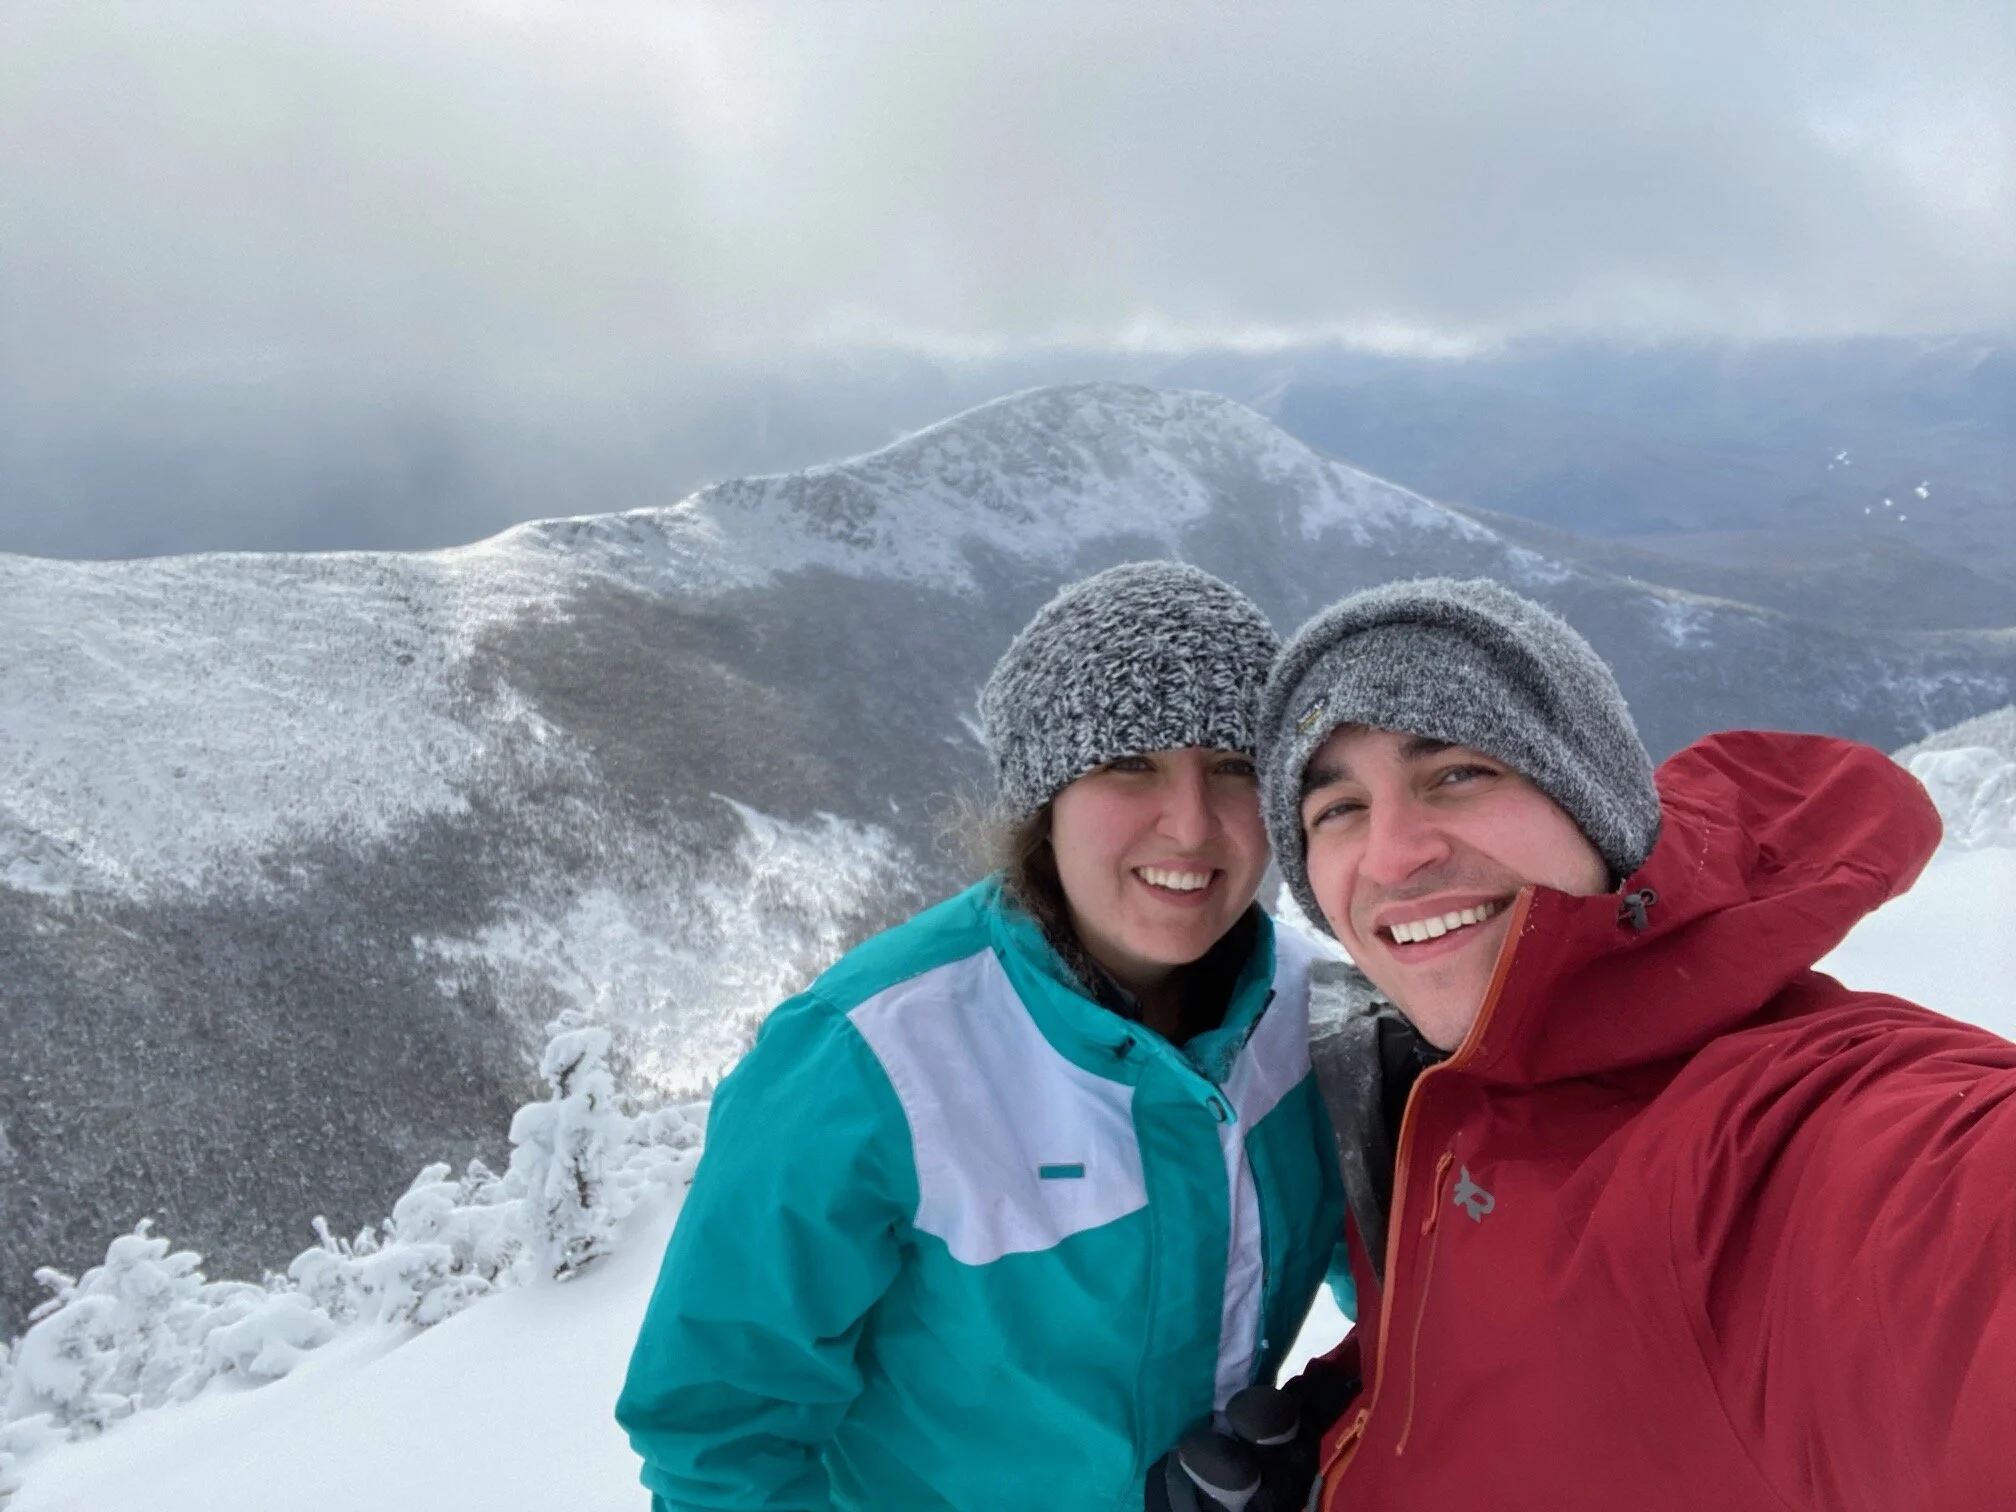
We got an early start to our second day by waking up at 5 AM. By the time we packed up our bags and had breakfast, we started hiking in the dark at just before 6 AM. There were actually snow flurries going on as we were gearing up and about a half inch of fresh snow on the trails! We wore our snowshoes the whole day as we knew we were going to encounter a lot of drifts due to the high winds and powdery snow. We started up the Twinway for 1.4 miles until the junction with the Zeacliff Trail. This portion of the trail ascends pretty steadily and gains about 1,300 feet in elevation. Right before the junction is the Zeacliff outlook which you cannot miss out on! The views from this outlook are phenomenal, but unfortunately for us it was very cloudy this early in the morning. From the Zeacliff outlook, it’s another 1.6 miles to the summit of Zealand. This part of Twinway is pretty simple with easy terrain, though there is one section that is steep and requires the use of a ladder (which was covered in snow). The trail gains about 600 feet in elevation over this 1.6 mile period. About half way, there is a short spur that takes you down to Zeacliff Pond. We did not stop, but we’ve heard that it’s very nice to visit. You will come to a cairn that marks the 0.1 mile spur to the true summit of Zealand, which is wooded and has no views. At this point, it was starting to be very windy so we added a layer and face protection then dropped our packs and quickly tagged the summit of Zealand. Winter 48 peak #10 for us!
Now it was off to cross Mount Guyot! After Zealand, the Twinway descends for a period of time at a moderate grade before ascending again at a moderate grade. After 1.3 miles and 550 feet in elevation gain, you will come out of the woods and be at the open summit of Mount Guyot - a beautiful mountain that is not an official 4,000 footer. This summit normally has phenomenal views, but it was completely socked in when we were here. This crossing can be very difficult in low visibility, and that is exactly what we were dealing with, along with very high winds. We lost the trail for a moment, but then found our next cairn and safely made it onto the Bondcliff Trail at the junction which then heads back into the trees. The snow up here was completely covered in a sheet of ice and every step we took with our snowshoes it felt like we were breaking glass!

Our headlamps were leading the way for us as we started out in the dark

The views from the Zeacliff outlook. Directly behind us is Whitewall Mountain

Emily making her way up the steep pitch where the ladder is buried in the snow

Summit selfie on Zealand
Getting ready to head above treeline on Mount Guyot

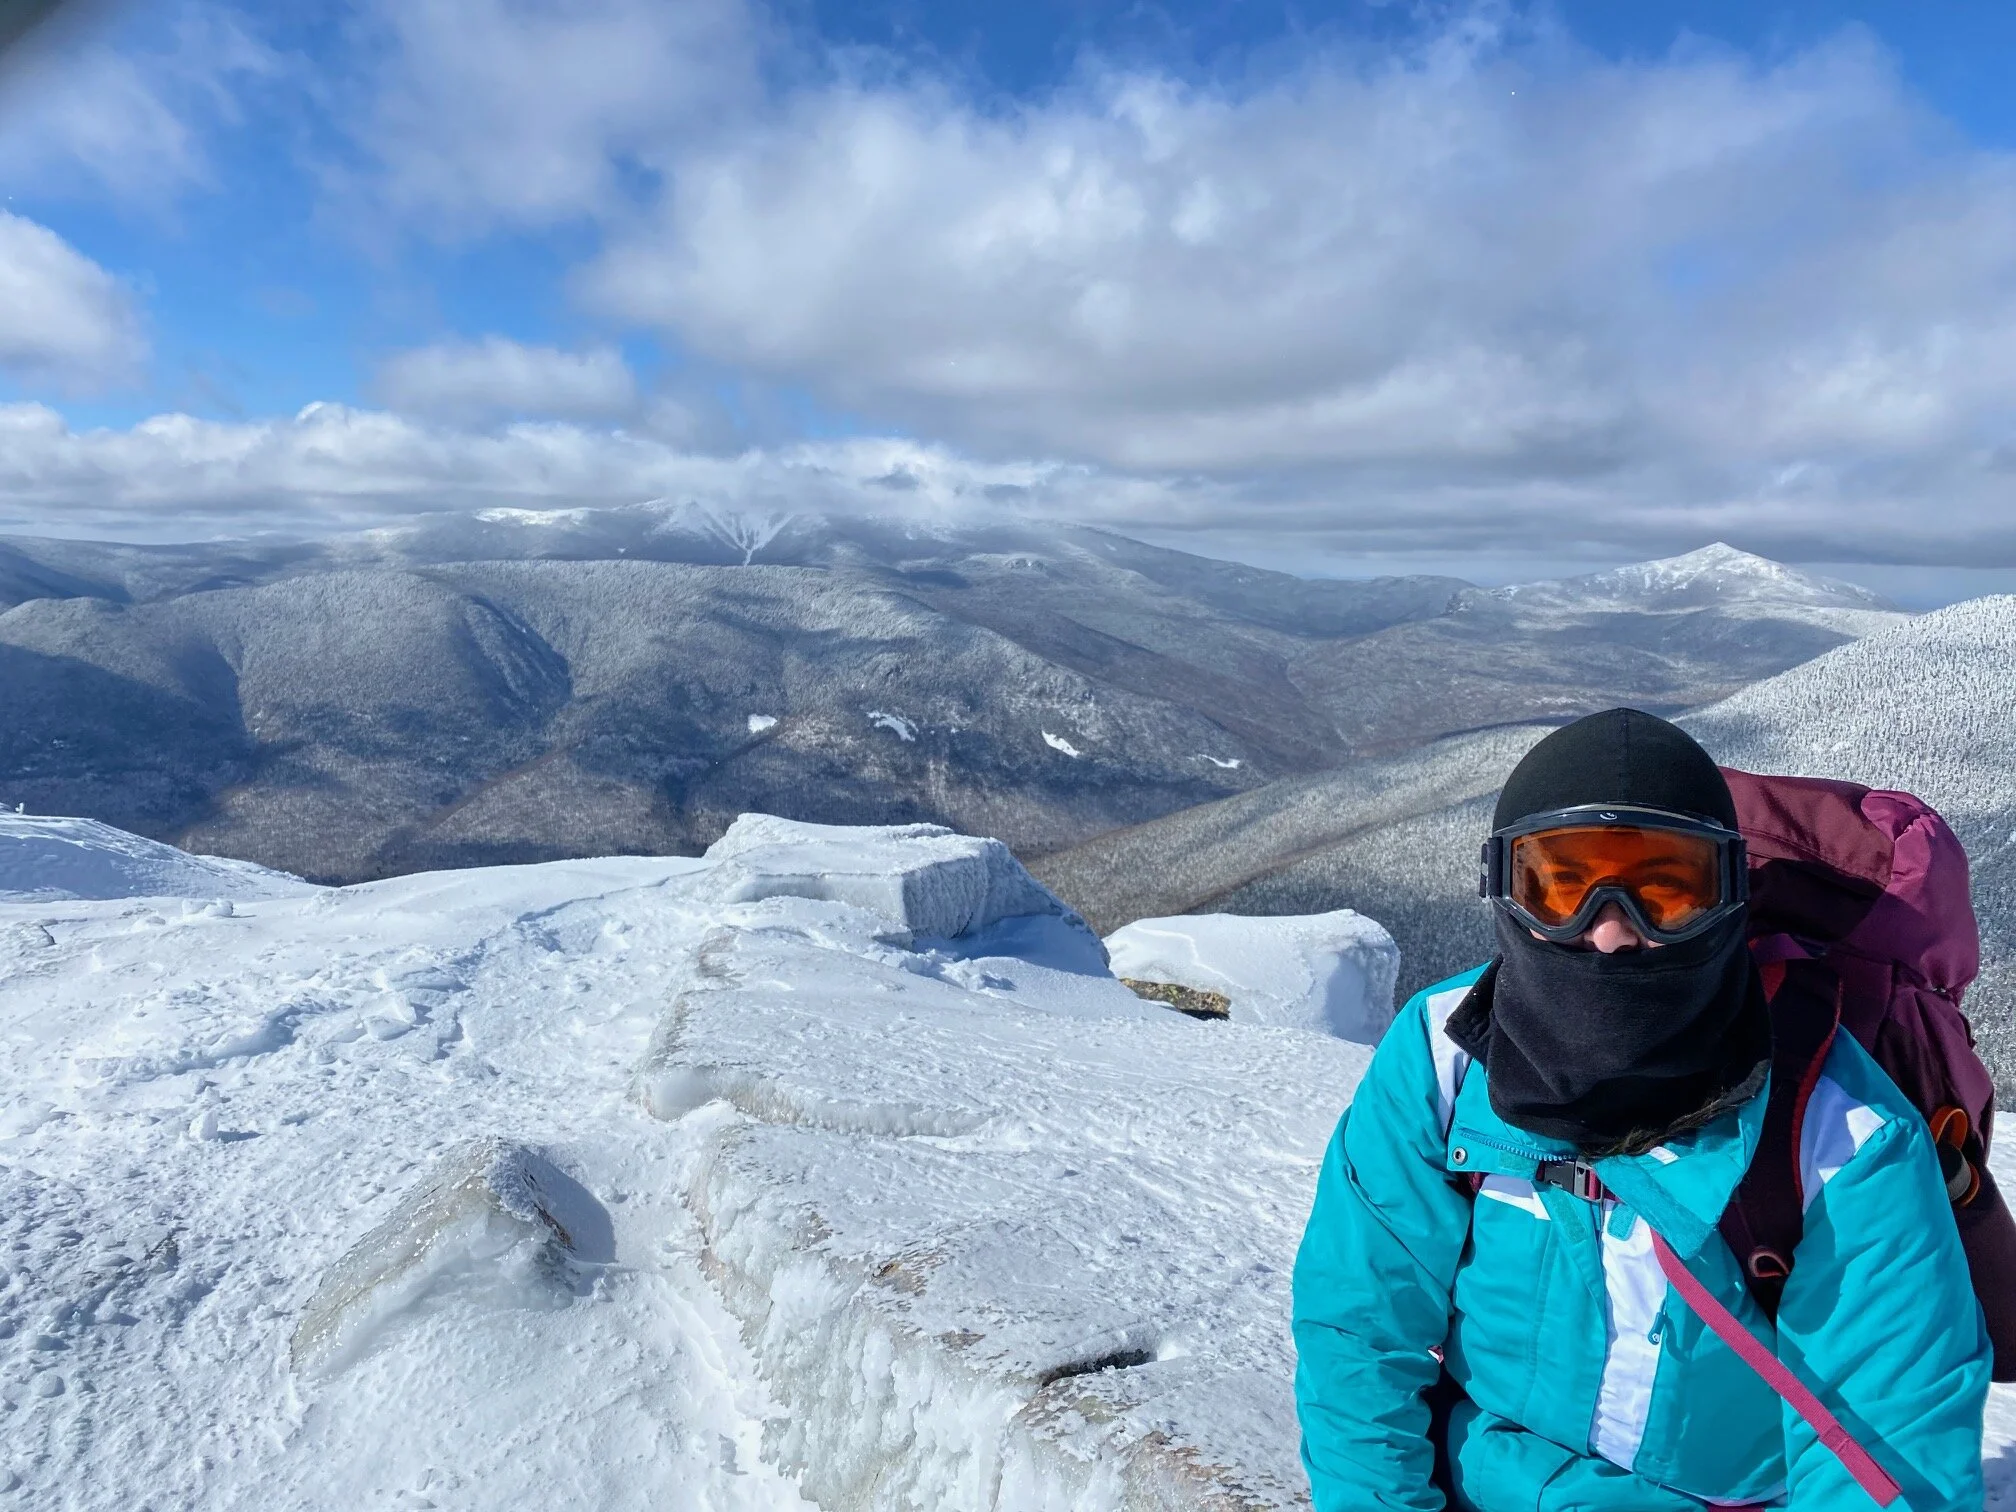
Quick selfie at the summit of Mount Guyot. No views at this point due to thick cloud coverage
Now on the Bondcliff Trail, it’s about 0.6 miles to the spur trail that leads to Guyot Tentsite, with minimal elevation gain and loss. When we passed by, we were surprised to see the spur path to the tentsite pretty packed out - we figured not many people came here in the winter. The West Bond Spur Trail is about 0.1 miles up the trail from the Guyot Spur. The sign is small and easy to miss, so keep an eye out for it. The West Bond Spur Trail itself is half a mile long and ascends 200 feet to the open summit of West Bond. We dropped our packs and made our way over. The trail is moderate until the very end, where there is a steep part up to the summit. This portion of the trail was heavily drifted so snowshoes were really helpful. We got to the top just in time for sky to start clearing slightly and for us to see some views of the ridge and the peaks we were heading to next! It was extremely windy and cold, so we grabbed a few photos and got back in the trees. Winter 48 peak #11 for us! Once back at the start of the West Bond Spur, it’s about half a mile until the summit of Mount Bond. The trail to here is steep, but goes quick... it’s about 400 feet in elevation. Mount Bond has spectacular views of the surrounding area. The sky was really starting to clear now and we were so excited to enjoy insane winter views! Winter 48 peak #12 for us! We knew the next portion of the hike was going to be above treeline, so we layered up and put on our face protection. After Mount Bond, it’s 1.2 miles to Bondcliff. Personally, this was our favorite stretch of trail because as you descend from Mount Bond, you get incredible views in front of you. The trail descends moderately/steeply before coming to a long and flat area leading to the summit of Bondcliff. The winds in this flat section were INSANE as they practically knocked us over! We had to stand still for a few moments before we could continue hiking just so we didn’t fall over! Thankfully at this point the sky was much more clear, and we got to soak in the views along both sides of the ridge. Like Mount Guyot, the snow here was covered in a layer of ice and broke like glass every time we stepped on it! Once at Bondcliff, the winds died down and we got relax a bit before starting our long descent. We didn’t dare go out on the cliff to take the infamous Bondcliff photo due to the winds and ice. From Zealand Falls Hut to the summit of Bondcliff, it took us about 6.5 hours. Winter 48 peak #13 for us! The hard part was over and we successfully summited these tough peaks in the winter!
At this point, we started our descent and followed the Bondcliff Trail for another 6.2 miles before reaching the next junction. The first 0.3 miles are above treeline. The descent will be long but it is mostly moderate terrain. There was one section right as we were entering back into treeline where we kind of slid down and had to jump down a ledge, but it was not too difficult. When you’ve gone about 3 miles from Bondcliff, the trail flattens out and you will be in for a long walk out. At this point we strapped our snowshoes to our packs and put spikes on so we could walk faster. After the 6.2 miles from the summit of Bondcliff, you’ll reach the junction with the Lincoln Woods Trail, where you will still have another 2.9 miles of flat walking before you get back to the parking lot. Some people enjoy this trail, but we absolutely hated the last 5+ miles of this hike - since it’s so flat, it feels like it goes on forever! Especially when you have a heavy pack on and you’re tired! All in all, this is one of the most beautiful hikes we’ve done in the Whites, both in the summer and in the winter. These mountains are very remote, so you truly feel like you’re in the wilderness. While challenging, the trails were never anything overly difficult. This is a great option for first time winter backpackers!

The small sign marking the start of the West Bond Spur Trail; it’s easy to miss!
Summit selfie from the top of West Bond! Bondcliff is visible in the background

Looking back at West Bond as we near the summit of Mount Bond

Looking down towards Bondcliff from the summit of Mount Bond

We were so happy that the sky cleared up and gave us amazing views!

Looking back at Mount Guyot from the summit of Mount Bond; figures, no clouds over there now…

Doing a little modeling for Osprey as we head down the ridge towards Bondcliff

The infamous cliff of Bondcliff is visible over Emily’s shoulder with Mount Bond in the background
Owl’s Head visible with Franconia Ridge partially in the clouds behind it; Garfield peaking out on the right

The long, straight, flat portion of the Bondcliff Trail

More long, straight, and flat trail on Lincoln Woods

Selfie on the bridge crossing the Pemi at Lincoln Woods. We did it!!